Patented Uniform-Parallel Point™
It has come to our attention that other brand
sharpeners besides the Lindsay sharpener are being used to reproduce the
Lindsay patented parallel point. If you have been taught to grind,
make and use this point without being made aware that the point is patented or
that the license is necessary, you are infringing on the patent. If this
is the case, please fill out the license agreement at this time.
http://www.lindsayengraving.com/License.htm
For information about patents and the reason
for the point license agreement, review this article by attorney Michael Artemis
titled::
An insight on the United States Patent System
If you have purchased the Steve Lindsay
template based sharpener, then you were automatically licensed and you will not
need to fill out the online license, as you were licensed in that method. The
instructions for sharpening with the Lindsay sharpener come with the sharpener.
There are
also on-line instructions for it at this link:
http://www.engravingschool.com/private/Lindsay%20Sharpener.htm
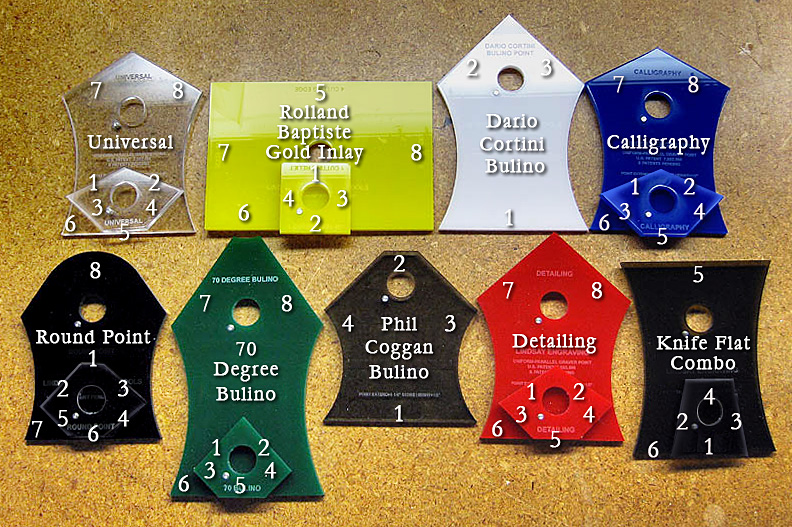
The Steve Lindsay template based sharpener is
made specifically to reproduce the Lindsay patented point easily. It is quick
and less expensive than other sharpeners on the market. The basic sharpener with
a Universal 116 degree template is $89. Additional templates for other V angles
as well as other various points are around $23 a set.
http://www.airgraver.com/sharpening.htm